Overview
The Sandberg fingerprint hard disk box arrived at my door four or five days ago. I have been getting to grips with it, and finding out just what makes this drive enclosure special. Read on to see what I think, and indeed, to see if this is the drive enclosure for you!
Review
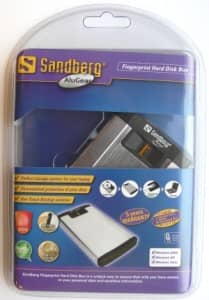
This is what you would receive were you to order the drive enclosure from Sandberg. As you can see, it comes in one of those blister packs that are almost impossible to open. However, after a heroic struggle, I got to the contents, and I have photographed what is included.

In the pack is the drive enclosure, a USB cable, a pack of screws, a small screwdriver, a driver CD, a short manual, and a protective case for the enclosure. Lets take a closer look at the enclosure.
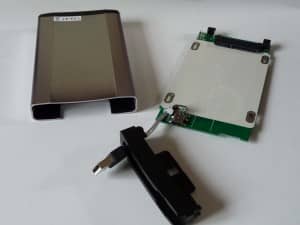
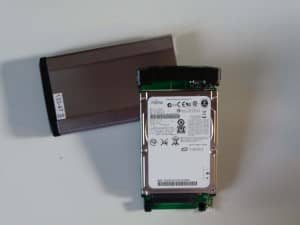
The enclosure is made from aluminium 1 mm thick, and feels solid and well made. the ends are capped with plastic that holds the circuit board in place. The ends screw in with small screws that fit flush with the aluminium case.
Here you can see the fingerprint reader, and attached USB 2.0 cable. Fitting the drive in to the enclosure is a fairly easy task, although the cables that go from the USB attachment to the circuit board did get in the way a bit.
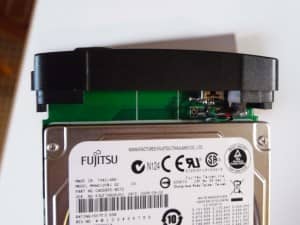
I used a 120 GB SATA II 2.5 ” drive for the enclosure. There is no way to fit older IDE drives. The drive was fitted with four screws that screw through holes in the circuit board. The plastic ends screwed into place nicely, and the whole thing felt as if it would last the distance.
Once it is all in place, you then attach the drive to your computer. The manufacturer supplies a cable that uses two USB ports. One for data, the other for power. However, I found that with the two computers I used, and a laptop, that the attached USB cable was sufficent to power the drive.
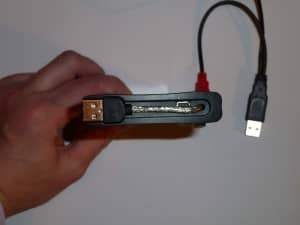
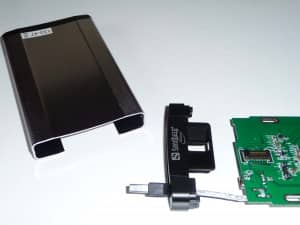
As you can see from the photo, the attached USB cable fits snugly into the plastic cap when not in use. Unfortunately, this blocks access to the mini-B USB socket, a minor issue though. Also there is a distict lack of a fire wire port, and an external SATA would have been nice.
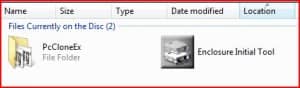
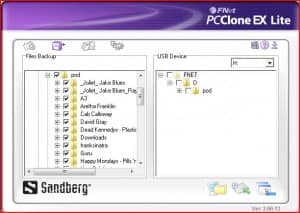
Plugging the drive into the computer for the first time, you then need to run the software on the CD. The CD contains two bits of software, the Enclosure Initial Tool that preps the drive for use, and the PC Clone Ex software for the one touch backup.
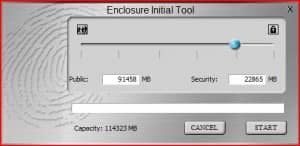
When you run the Enclosure Initial Tool, you are asked how much of the drive you would like to encrypt. You push the slider along to pick the amount of space you would like as the private, then click Start. After a brief warning that all data will be lost, the software partitions your drive as instructed, and asks you to re-plug the drive in.

After plugging the drive in again, an explorer window appears with the Finger Verify application. Double click on this and you are asked which finger you would like to use. Here you could use one person or ten people, as the software will store up to ten fingers. However, in practice the reader had difficulty reading some fingers over others.
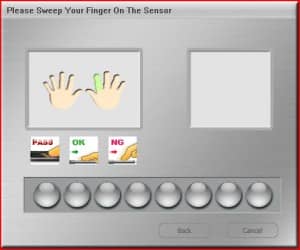
You have eight attempts to swipe your finger before it gives up. Usually it only take three before you are done. You are then asked to put in a backup password, in case your finger goes missing, or the sensor malfunctions.
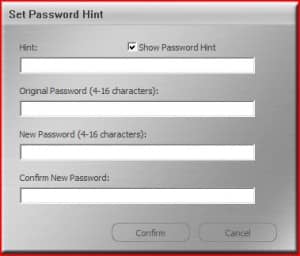
Now the password is set, you are done! The two partitions will now appear as two separate drives on your computer, and once the drive has been verified by your finger or password, that is it until you take the drive out. The nice thing is that once this is done, the settings are then stored on the drive, and you get to your private partition by running FingerVerify.exe on the other computers you use. This then runs a small piece of software that deals with the encrypting and decrypting of your data, and the management of your security settings. The interface of which lives in the system tray.

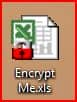
A nice feature is that the software will also encrypt files on your hard drive as well. Simply right-click on the file you would like to encrypt, and select “Encrypting…” from the menu. You then need to swipe your finger, or put in your password. A padlock icon appears on the file to let you know the file has been encrypted. The decryption is done in the same way.
Unfortunately, the process does not work for folders, so you will have to zip them first. I also have no idea how many bits the encryption uses, or indeed what encryption is used. Their website yielded no answers, nor did the literature that came with the enclosure.
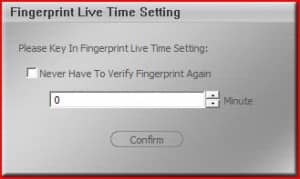
Another security feature of the drive is that you can set the time interval that is needed before you must re-authenticate to the software. This does not effect access to the private partition, but the settings. So if you have the Time Live setting set to zero, then each time you access the settings you must authenticate, or set it higher, and risk someone adding their own finger to your drive while you are away!
After you have taken the drive out, the software then seems to dissolve, and no further system resources are used. Although almost nothing is used when the drive is in full flight anyway. One issue that did concern me slightly is that the FingerVerify.exe will need admin privileges to run, and if you use your drive on a corporate computer where we can’t all be admins, you may be stuck without your data from the private partition.
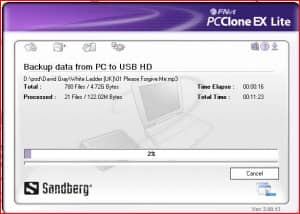
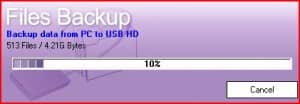
The drive also has a one touch backup facility as well. The software that handles this is the PC Clone Ex software. This is pretty much a set and forget. Once you have installed the software and chosen the folder, or folders, that you wish to back up, you simply from then on, push the button on the drive, and the backup is done. The only slight issue I have with this is that the backup folder is always on the private partition, and hidden. Although it’s not a bad choice, I would also like to be able to choose where the data goes.
Sandberg has made a very capable drive enclosure here. I like the solid feel of the unit, and the software works very well. I had a few issues trying to get my first finger of my right hand to work with the scanner, but my index finger works like a charm. I would like to know what encryption the drive uses though, but I’m sure it will be enough to flummox all but the extremely savvy. In fact, this enclosure has a lot going for it, except the price. At almost £50 including VAT I feel that the enclosure may struggle without the addition of an eSATA or firewire port. Indeed, most drives at this price point have the option of at least fire wire. You can be assured though that with a five year warranty this enclosure will be happliy storing your data for a long time.
The Gaj-It Verdict
Design: 7/10
Usability: 8/10
Features: 6/10
Value: 7/10
We Say
All said and done, I like the enclosure, I just feel it’s let down by the lack of any other option but USB.
Technical Specs
- Enclosure:
- USB 2.0 interface
- HDD Support: 2.5″ SATA I / SATA II
- Power/Activity LED
- Powered by USB
- Aluminium material with plastic frame
- External connectors: 1 USB Mini-B female, 1 USB A male
- Internal connectors: SATA connectors for data and power connection
- Scan area: 9.6 mm x 0.8 mm
- Image resolution: 508 dpi
- Max: ±20 KV ESD protection
- Image level: 256 gray (8-bit ADC)
- Surface mechanical strength: 12 Gpa
- Frame rate: Max. 300 frames/sec
One thought on “Sandberg Fingerprint Hard Disk Box 2.5 review.”
My fingerverify.exe will not open, How do I retrieve my data?